Connecting to Dynamics with an Azure App Registration
Check out how DRM templates connect to Dynamics environments here. There are 3 available choices, this walkthrough explains how to use an application registration in Azure to connect to a Dynamics instance with a DRM Template.
Note
In most circumstances you should be able to use an application registration to connect to your dynamics instances. Some interactions with entities may however require user impersonation during deployment. Follow this link for connecting to a Dynamics environment using user credentials
Prerequisites
- An existing application registration setup in Azure. We will reference this in the walkthrough. To setup an App Reg Connection follow this guide.
- A Dynamics environment with system administrator access, this is the environment you will deploy the template too.
- PowerShell with the DRM module installed. Follow this guide to install the powerhsell module
Add your app reg in Dynamics as an App User
The application registration will need to be registered as an Application User in the Dynamics environment you are deploying to for the connection to work.
Log into your dynamics environment via the https://admin.powerplatform.microsoft.com/ portal.
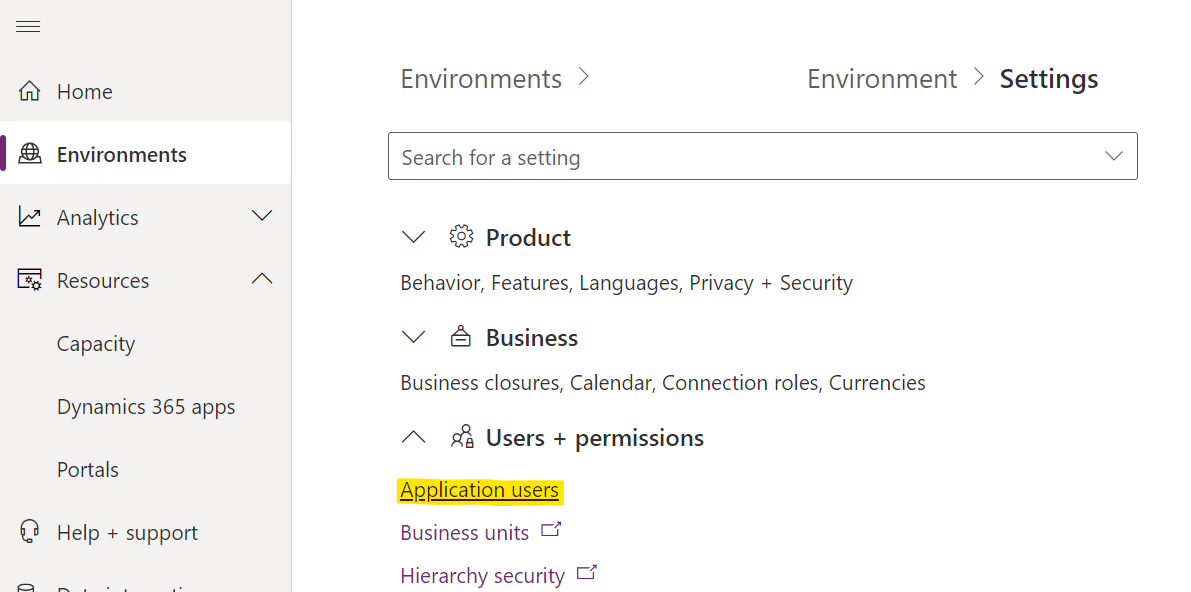
Click on Settings

Click on Application Users

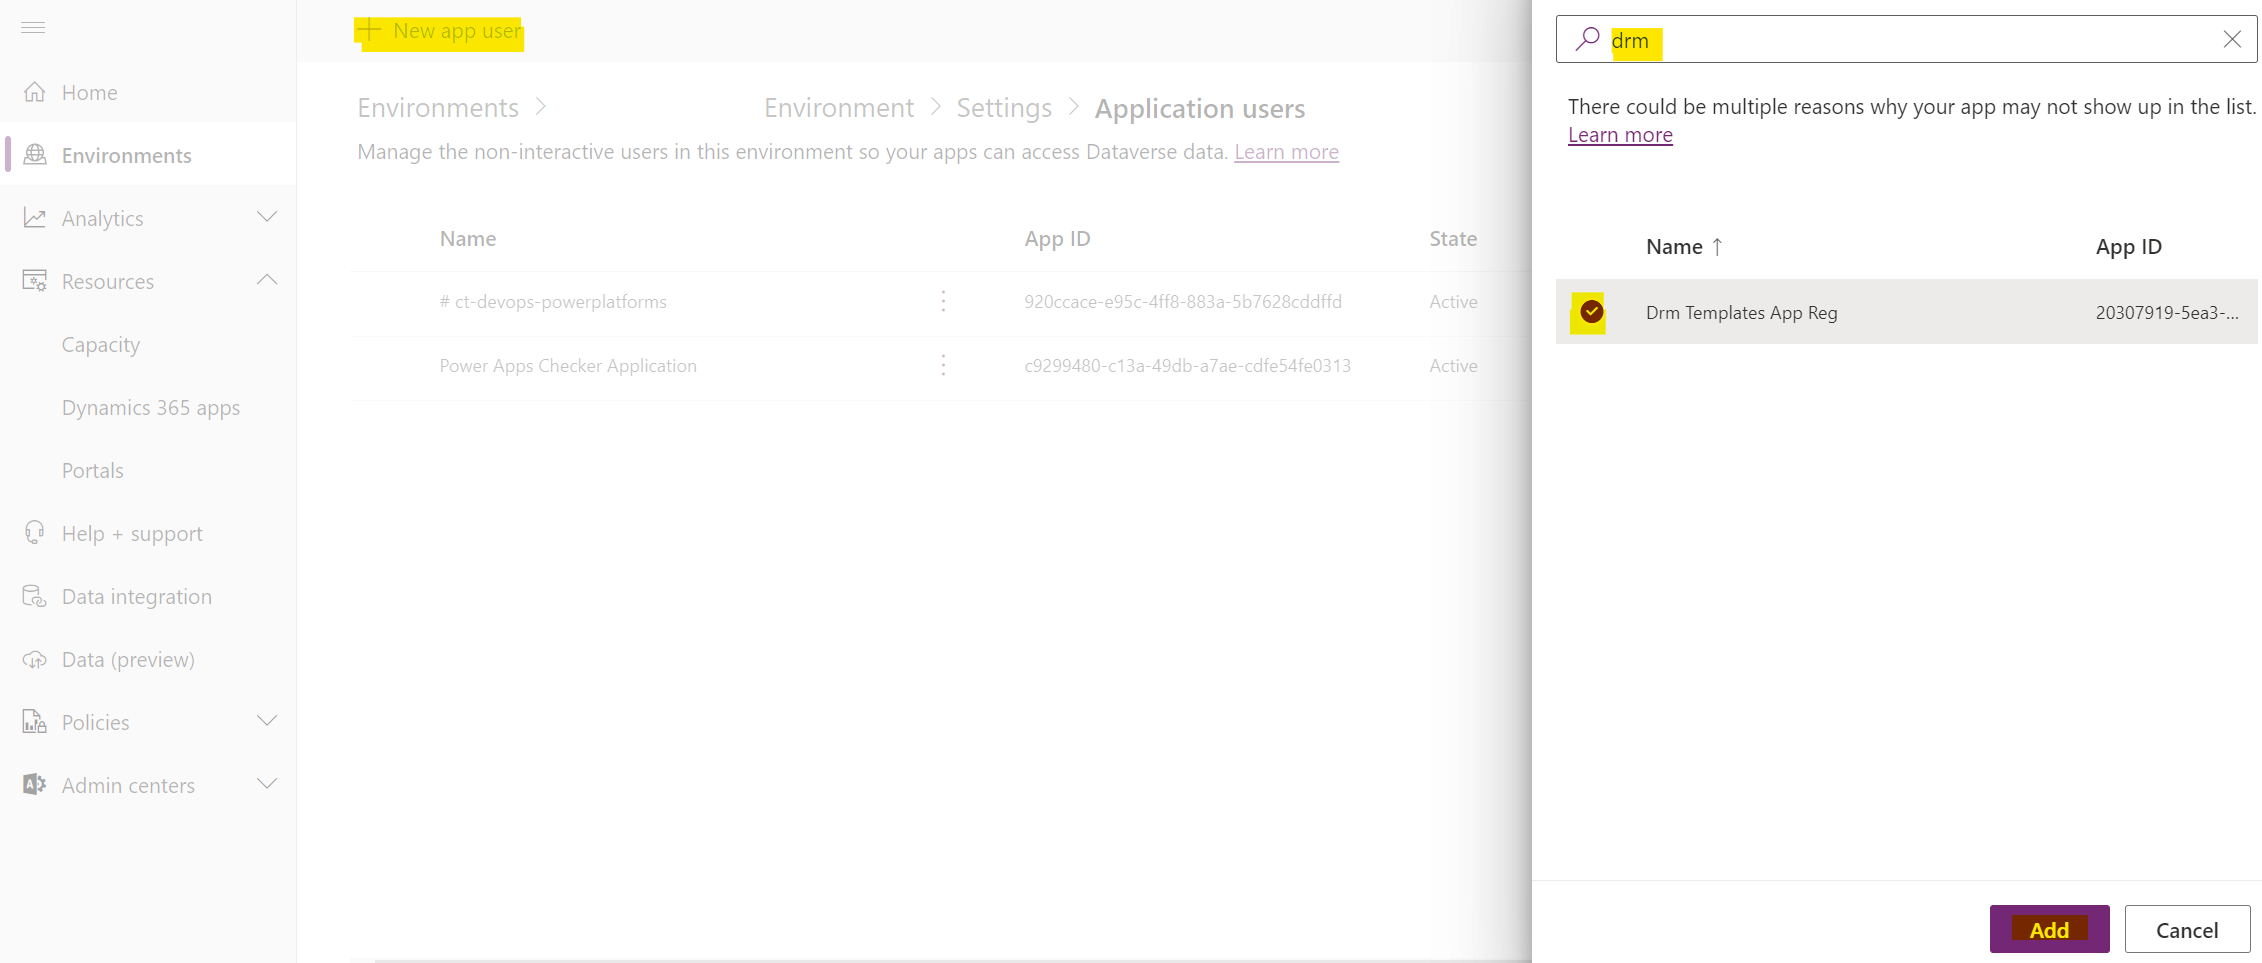
Click on New App User and search for the app reg you just created. Then click Add

Now give the app reg the System administrator role and click Create.
Now the app reg has access to your dynamics instance.
Generate a template
Let's generate a simple template with parameters for the application user details.
Run this PowerShell command to connect to your Dynamics environment
connect-crmonline -Username "<useraccount>" -ServerUrl <dynamics url>
Now run the command below to generate the template. We will add the
-SetupTemplateForAutomation switch which will add the parameters we need.
New-DrmTemplate -entityName queues -filter '$select=name&$top=1' -SetupTemplateForAutomation
Note
The -SetupTemplateForAutomation switch makes it easier to generate templates
that you might want to use in an automation process.
Your template will look something like this.
{
  "$schema": "https://schemas.drmtemplates.io/2021-03-01/deploymentTemplate.json#",
  "contentVersion": "1.0.0.0",
  "parameters": {
    "drmclientId": {
      "type": "string",
      "defaultValue": "00000000-0000-0000-0000-000000000000"
    },
    "drmclientSecret": {
      "type": "string",
      "defaultValue": "00000000-0000-0000-0000-000000000000"
    },
    "dynamicsTenantId": {
      "type": "string",
      "defaultValue": "00000000-0000-0000-0000-000000000000"
    }
  },
  "resources": [
    {
      "targetenvironment": {
        "applicationCredentials": {
          "clientId": "[parameters('drmclientid')]",
          "clientSecret": "[parameters('drmclientSecret')]",
          "tenantId": "[parameters('dynamicsTenantId')]"
        },
        "url": "<your dynamics url>"
      },
      "type": "drm.crmbaseentity/queues",
      "apiVersion": "2023-01-09",
      "name": "GeneratedTemplateFor_queues",
      "properties": {
        "data": [
          {
            "queueid": "33186e2b-9442-4d3b-8c50-cc777c1eeb9f",
            "name": "Application User Queue Demo"
          }
        ]
      }
    }
  ]
}
Let's make sure we create a queue on the first run of the template. Replace the
data property in your template with the json below
"data": [
          {
            "queueid": "33186e2b-9442-4d3b-8c50-cc777c1eeb9f",
            "name": "Application User Queue Demo"
          }
        ]
For each of the parameters drmclientId, drmclientSecret and dynamicsTenantId
replace the defaultValue with the application registration details.
Warning
We advise not to leave sensitive information like an application registration client secret as plain text.
If this was being used in an ADO pipeline then the client secret could be retrieved from an ADO variable or keyvault.
Deploy the template
To deploy the template run this command
New-DrmDeployment -TemplateFile '<absolute path to your template>'
Log into your Dynamics environment and search your queues
for one called Application User Queue Demo
Next steps
- Learn how to reference keyvault secrets in parameter files.